
|
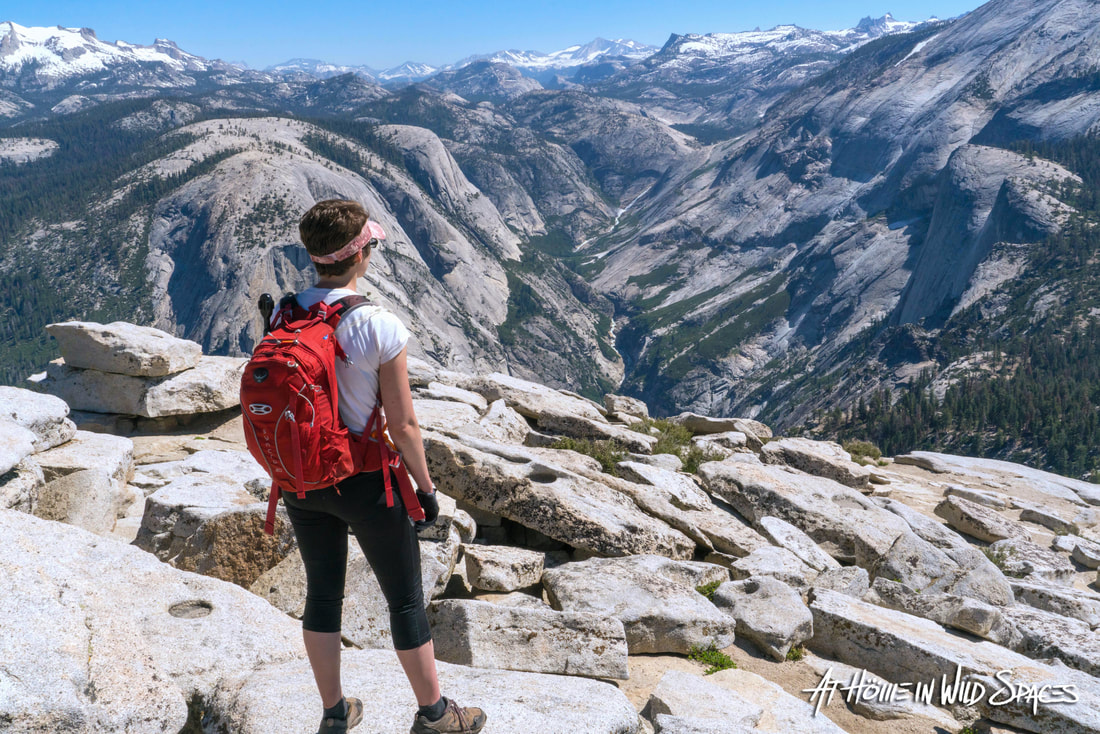
Recently, there's been a troubling spike in emergency incidents and if hikers don't step up their game, more people are going to get hurt or worse. Fortunately, you're reading the ultimate, cut the crap guide to hiking Half Dome in Yosemite National Park. Here you'll find everything you need to hike to this iconic summit including crucial permit information information, training, trailheads, tips and far and away the best videos of the trail to be found anywhere. Enjoy, and stay safe out there! The absolute best video guide to hiking Yosemite's Half Dome. The trek to the summit of Half Dome is easily Yosemite's most famous trail, and consistently listed as one of the "best" and/or "most dangerous hikes" in the world. Or as one writer for National Geographic put it “the hike you’ll talk about as all others fade into pleasant memories.” While that's a bit hyperbolic, those who have made it to the summit will tell you, Half Dome is special and offers hikers a unique and iconic experience. Just make sure you're ready. Preparation“One does not simply [hike Half Dome]”. Due to the trail’s difficulty and popularity, successfully reaching the summit requires more planning and foresight than just throwing some snacks into a backpack and lacing up your hiking boots. Red Tape Crowd pressures, coupled with trail limitations, safety concerns and the Park Service’s charge to preserve and protect Yosemite landscape has given rise to a sometimes controversial permit system. Without a permit, you will not be permitted past the base of the subdome between May and November where park rangers check permits and IDs. Ascending the subdome and cables without a valid permit can result in a fine of $5000 and even jail time. Without a permit, your dream of reaching the summit will remain exactly that. So, Item number one on your to do-list is to apply for a permit (day and overnight options available). 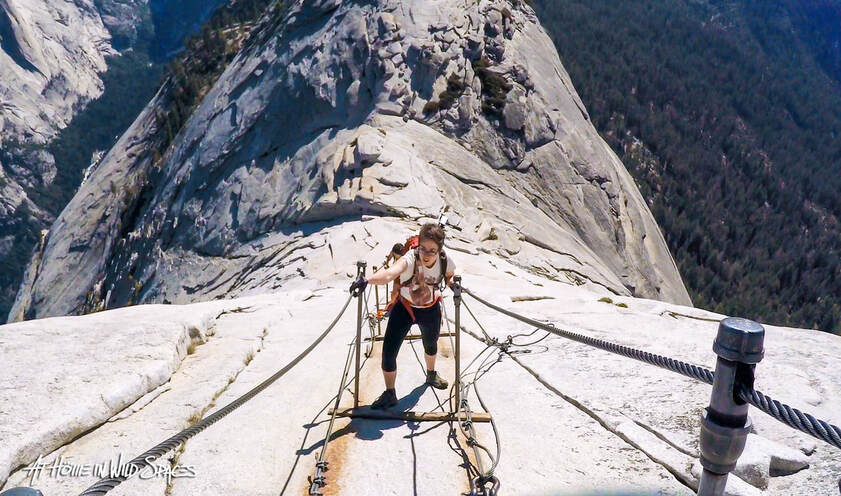 Ascending the Half Dome Cables. How to apply for a permit During the peak season (generally between Memorial Day and the second Monday in October), “a maximum of 300 hikers per day are allowed” access to the subdome, cables and summit. These permits are split between day hikers (225) and backpackers (75). Plan ahead and decide if you’d like a day permit or an overnight wilderness permit. To improve your chances, avoid weekends and holidays if at all possible; and if your schedule allows, apply for a range of days rather than a single day. If your schedule is flexible you’ll greatly improve your chances of scoring a permit. For a breakdown of days with more favorable odds, click here. Day hike permits (lottery only) To apply for the day hike permit lottery go to recreation.gov between March 1st and March 31st, submit your application for a maximum number of six day-hiking permits and pay the $10 non-refundable application fee. Only one application per person is allowed, “additional applications will be voided without refund”. You'll recieve an email in mid-April with lottery results. Backup: Depending on the number of remaining or canceled permits, around fifty day-hike permits will be distributed via a daily lottery during peak season. If you draw a zero from the March pre-season lottery, you may apply for the daily lottery at recreation.gov. (Important) Daily lottery applications must be submitted two days before your intended hike date. Hiking to summit during the offseason is allowed without a permit. But, if attempting a pre or post season ascent, be advised that the cables will be “down”, meaning the steel posts have been removed. This makes the ascent more difficult and dangerous. Addition climbing gear and mountaineering experience is strongly recommended. 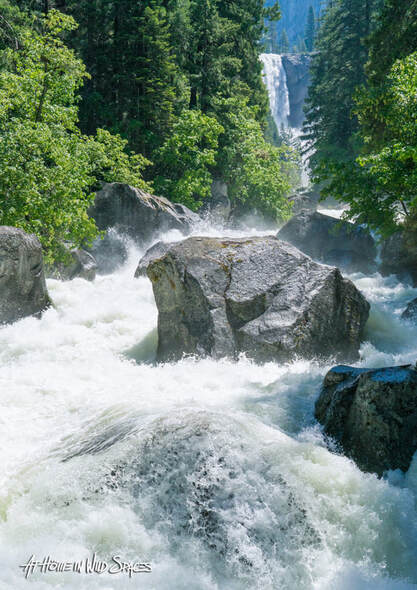 Wilderness or Backpacking Permit Reservations (lottery/first come) Applications for wilderness permit reservations are accepted beginning 24 weeks before your intended start date and are submitted through recreation.gov. Forty percent of wilderness reservations are held in reserve and become available seven days before the intended start date (Your application must be completed three days before your intended start date. Any left over wilderness permits are available on a first come first serve basis. But few if any permits will be available on any given day. If you wish to summit Half Dome as part of your backpacking itinerary, you must request the addition of a Half Dome specific permit to your wilderness permit. This can be done when applying for your wilderness permit, or when picking up your backcountry permit at the wilderness office. An additional $10 fee separate from your wilderness reservation fee will be added for each Half Dome permit issued. In order to add a Half Dome permit to your overnight wilderness permit, you must begin your trek at one of seven trailheads. All three trailheads highlighted in this guide are included on that list. Unlike day hike permits which are only valid for a single specified day, wilderness permit holders who have added a Half Dome permit may access the cables and summit on any date listed on their wilderness reservation permit. This offers backpackers additional flexibility. For more details click here: www.nps.gov/yose/planyourvisit/hdwildpermits.htm DifficultyDifficulty is a relative concept which varies drastically from one hiker to the next depending upon both fitness and hiking experience. That being said, even veteran hikers can find themselves in distress when ascending or descending Half Dome. Do not underestimate this hike. At 14 or more miles round trip, and a minimum of 4800 ft of ascent, Half Dome is considered the most strenuous day hike in vicinity of Yosemite Valley. DO NOT attempt this hike without sufficient physical preparation or inadequate gear and seriously consider consulting a physician before attempting. Mere mortals will require 10 or more hours to complete the shortest route (Yosemite Valley via The Mist Trail). Begin your hike early in the morning (possibly well before sunrise) and plan on finishing in the evening. Whether you're planning on completing the whole trek in one day or as an over-night excursion a flashlight and/or headlamp should without question be included with your gear. Record runoff on the Mist Trail in 2023. You've never seen a Mist Trail video like this. SafetySince 1930, the Mist Trail to Half Dome Route has claimed more than 60 lives. This is an especially hazardous trail for inattentive or foolhardy hikers and for obvious reasons. While the permit system, implemented in 2010, has reduced crowds on the subdome and cables by 66% there has been no corresponding drop in injuries and deaths. Water: Second only to car accidents, water hazards are Yosemite’s leading killers. The jaw-dropping waterfalls that punctuate Yosemite’s dream-like landscape have and will continue to remorselessly and brutally punished visitors who fail to exercise caution near whitewater and waterfalls. The Mist Trail alone keeps Yosemite Search and Rescue busy, responding to an average of 100 incidents a year. Take deliberate steps, wear quality hiking shoes, with good traction and ankle support, and exercise extreme caution near rivers and waterfalls — especially during spring and summer runoff. Tennis shoes are not appropriate. Just days before my wife and I made this trek in 2017, a local jogger slipped and fell along a portion of The Mist Trail and disappeared into the raging torrent beneath. A week later The Park Service was still looking for his body. Lives are lost every year because hikers fail to take the proper safety measures or become complacent near Yosemite’s rivers and waterfalls. You cannot swim in highly oxygenated whitewater. Weather: Daytime temperatures regularly reached 90+ Degrees Fahrenheit. Travel smart and intelligently manage your fuel and water intake throughout the day. You can learn more about water and fuel management by watching my rim to rim video series by clicking here: www.youtube.com/playlist?list=PLdRPR_VkYdYV9X-jOplYQG8duciJZIF4W. Travel when possible in the morning or evening hours to beat the heat during the hot summer months. That being said, due to the time needed to complete this trail (10+ hours) plan on hiking in hot conditions if visiting in the summer. Water features can offer some relief from the heat, but as mentioned above they can also be quite dangerous. Use good judgment and err on the side of caution. Adults should drink one gallon (4 liters) of water when hiking Half Dome. The last reliable filterable water is located along the Merced River in Little Yosemite Valley near the backpackers' campground. Do not proceed past this point without enough water for everyone in your party. Switching now from hot to cold, early mornings along The Mist Trail can be extremely frigid. Even on warm days The Mist Trails ice-cold namesake is impossible to avoid during peak runoff. Bring a jacket and waterproof layer or take the detour along the John Muir Trail to keep dry. If you feel your core temperature drop and you can’t warm up in the sun, keep moving. Without external warmth, you’ll need to generate your own. As always, your best option is to be prepared. Finally (as far as weather is concerned), remain aware of potential storm systems – especially when near the subdome, cables or summit. Lightning has claimed the lives of numerous individuals and injured many others on Half Dome’s subdome and summit. If stormy conditions are likely, turn back and get to lower elevations quickly. If you see dark clouds or hear thunder, do not take shelter on the summit or the subdome. Start your descent immediately and get to a lower elevation as quickly and safely as possible. Should you find yourself in a dangerous situation, stay calm but move deliberately while remaining aware of changing conditions and potential dangers such as rainfall, which can make granite extremely slippery and result in traffic jams and hazards on the cables and elsewhere along the trail. 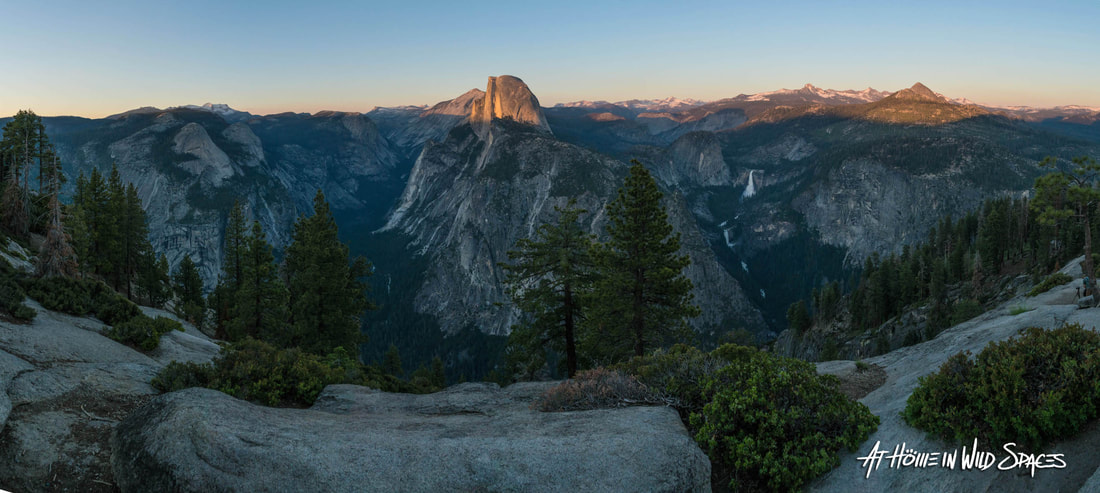 View of Half Dome from Glacier Point Drop-offs: The trail to the summit of Half Dome brings you into close proximity to some breathtaking drops. If you are extremely averse to heights, you may want to reconsider attempting to summit Half Dome. Exercise caution near ledges or cliffs. Falls from these dizzying heights are nearly always fatal. For your safety, stay on the trail and help prevent erosion, as well as trail and vegetation damage. WildlifeBlack Bears: Bears are the animal most people think of when it comes to wildlife safety and with good reason. Yosemite National Park has made great strides over the past decades to counter years of poor bear policy and practices. That being said bears represent minimal risk to responsible hikers. Stay aware of your surroundings, store your food properly and hike in groups. If you encounter a bear, do not let it obtain human food and DO NOT RUN. Stand your ground, make noise and group together until the bear leaves. In the extremely unlikely event that a bear does attack, fight back and stay on your feet. Do not play dead. Playing dead is the last resort if attacked by a grizzly bear. Grizzly bears were driven to extinction in California nearly 100 years ago when the last know California Grizzly was shot outside the park in the 1920s. Any bear encounters should be reported to park rangers. (Important note on bear deterrents) Bear spray is not permitted in Yosemite National Park. Firearms are permitted as long as the carrier complies with all federal, state and local laws. “Discharging a firearm for any reason is illegal” within the National Park. 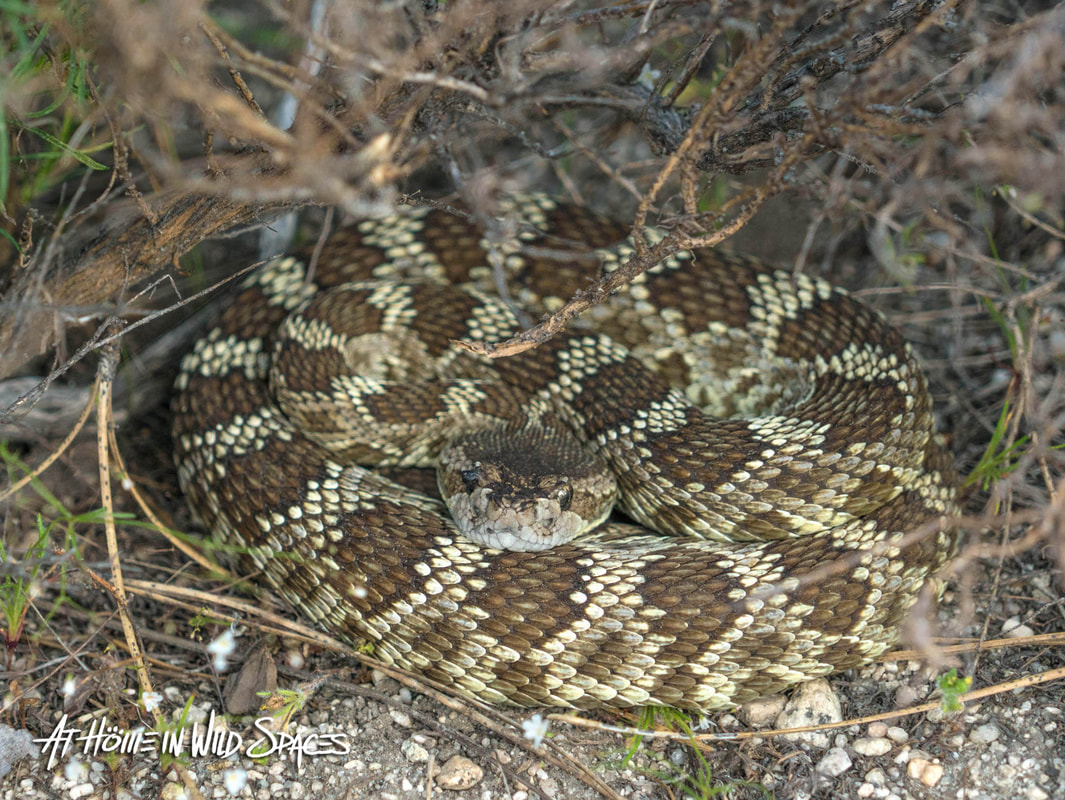 One of three rattlesnakes we encountered near Little Yosemite Valley during our hike up Half Dome in 2017. Rattlesnakes: Yosemite National Park is home to the Northern Pacific Rattlesnake. Although unlikely, it is quite possible to encounter one of these venomous snakes along the trail. If you do encounter a rattlesnake, give it plenty of space. Snakes only strike if they feel threatened. Given space and time, they will move out of the way. Inform any nearby hikers if you spot a rattlesnake near the trail. If you or someone in your party does receive a bite, remain calm. Here’s what to do— and not do: -Call 911 inform the dispatcher of the injury and your location. -Remove any rings, watches or tight clothing near the bite site as swelling will occur. -Gently wash bite and mark with a pen or marker if available and note the time. -Limit motion. Either wait for emergency personnel or carry bite recipient down trail. -If you are by yourself and/or unable to contact emergency personnel, continue at a steady pace to the trailhead. -Do not try to catch the snake. -Do not cut or suck on the bite site. -Do not wrap with a bandage or tourniquet. What’s important is reaching medical help as soon as possible. (Note) Roughly 25% of rattlesnake bites are "dry bites", meaning no venom is injected. Symptoms of envenomation include pain, burning, nausea, muscle twitches, swelling, and damaged tissue. Even if you don't immediately experience these symptoms you should still seek medical attention. Squirrels, marmots, chipmunks, etc: As strange as it may sound, of all the animals in Yosemite, the creatures most likely to do harm to people are generally seen as the least threatening. Squirrels, chipmunks and other rodents inflict the park’s most recurrent injuries, mostly in the form of bites. But they have also on occasion transmitted diseases such as the plague. It should go without saying, but do not feed, approach or harm any animal within the park. Beyond placing yourself and the animal in danger, you can also be slapped with a hefty fine. When it comes to wildlife, admire them from a distance. Safety is ultimately about situational awareness and appropriate preparation. Hike responsibly and stay safe. View of Half Dome from Glacier Point. Yosemite Valley to the left. Vernal and Nevada Falls (path of The Mist Trail) visible to the right. Routes and Trailheads
The CablesUntil 1875 when George G. Anderson became the first known climber to reach the summit, Half Dome was believed to be “perfectly inaccessible”. — No more. The cables are arguably the trail’s most technical and challenging section and should not be taken lightly. Ascending the final 400 vertical feet at a 50-degree angle along the cables is a full body workout. Make sure to savor the experience, but don’t become complacent in the process, missteps can be and have been deadly. The majority of falls from Half Dome occur along the cables. And the majority of those falls occur when the victim was descending the cables. NBC Nightly News contacted me to discuss the perils of the cable route following the tragic death of Danielle Burnett who slipped and fell in September 2019. I tell you what I told them. This trail is no joke and the granite along the cables is slick and potentially perilous under the best of circumstances. Make double sure your gear is properly secured before ascending or descending the cables. If something falls, you're not getting it back. Given the limited space on the cables and the fact that worn granite and perilous drop-offs are constant companions, it is essential to remain courteous, patient and cautious. Avoid pulling the cables away from the mountain as the steel posts propping them up are not anchored to the mountainside. Do yourself a favor and bring your own well-fitted gloves with good grip. After descending the cables take your gloves with you. Do not leave them at the base of the cables. The use of safety lines while historically popular is currently discouraged by the park service. Having hiked Half Dome before and after this change in guidance, expect traffic to move slower. There are a great many people who attempt to summit Half Dome who are not mentally or physically prepared for the cables, and without an anchor system, traffic often slows to a total stand still. Safety lines definitely slowed traffic before, but now days, anxious hikers are known to freeze and stop traffic completely. This is not the place to make a scene or rush someone who is freaking out. Communicate respectfully, and be encouraging. Patience and respect are ESSENTIAL when on the cables. No exceptions. 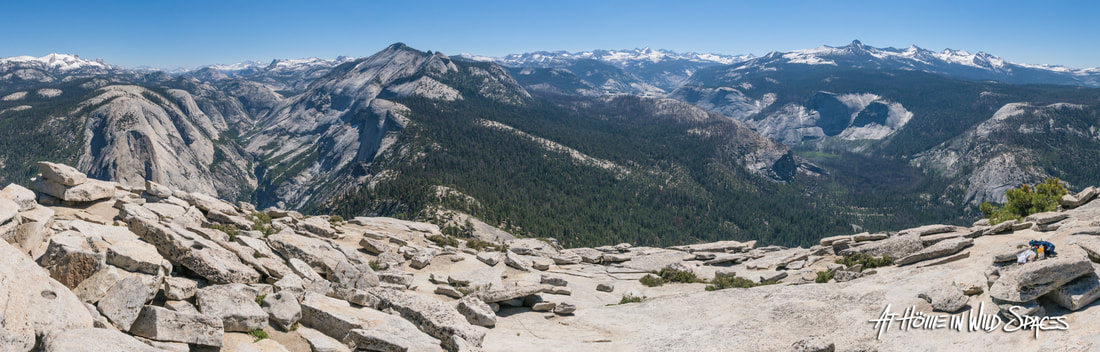 Panorama from Summit of Half Dome. North Dome to the left, Clouds rest left-center and Little Yosemite Valley to the right. Other Important InformationBathrooms and Water locations (Yosemite Valley Route): Happy Isle Trailhead (flush toilets, tap water, and plumbing) Vernal Fall Footbridge (pit toilet, last available tap water, and plumbing) Emerald Pool Just above Vernal Fall (pit toilet) Above Nevada Fall (pit toilet) Little Yosemite Valley Backpackers Camp (composting toilets) Bathrooms also available at Glacier Point (Panorama Trail) and Tenaya Lake (Sunrise Trail). If you are unable to reach one of these toilets before (cough)— zero hour, “deposit solid human waste in a cathole dug six inches deep at least 100 feet from water, camp, and trails”, and “cover and disguise the cathole when finished. Pack out all toilet paper (even used), garbage and hygiene products. Why? As stated above: This is an extremely popular trail in one of the world’s most popular parks. Thousands of people from all over the world use these routes every day and any waste or garbage, if not disposed of properly will quickly accumulate and degrade the experience and the landscape for others. Be responsible and preserve the landscape and experience for others. Souvenirs “Take only pictures, leave only footprints.” More than a catchy saying, it’s the law. Removing anything besides lawfully obtained souvenirs from a gift shop, whether rock, plant, animal, artifact, etc… is illegal and carries hefty fines and even jail time. With the exception of garbage, leave everything exactly as you found it. Final SuggestionObtaining any permit for Half Dome is a sweet, sweet deal. However, in my opinion — You simply can't do better than a wilderness permit. Not only do you get to spend one or more nights in the backcountry, but a wilderness permit is valid for any day of your backcountry trip, which gives you flexibility not enjoyed by day hikers.. Too often people treat hiking like a trip through a fast food drive-through. In and out and on their way. Yosemite's backcountry is a banquet for the spirit and the senses — Don't rush it any more than you have to— Savor it. There you have it! You should have all the essential information you need to successfully reach the summit of Half Dome. Did we miss anything? Make sure to come back and share your experience in the comments below along with any tips on how to prepare for Half Dome. Want more?
2 Comments
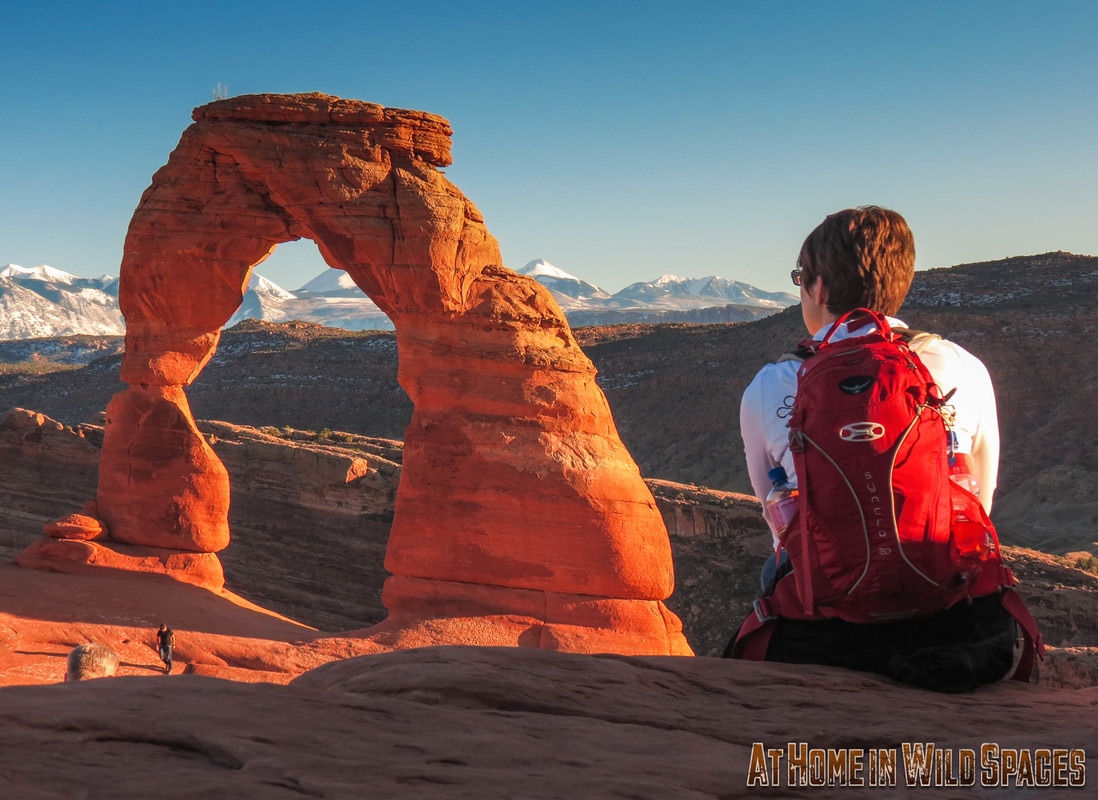
In 2012, nearly a decade since my last visit I returned to Yellowstone National Park for Labor-day Weekend. Though my most recent recollections of the world's first national park had aged significantly, they were anything but stale. Mere moments after passing over the park boundary, I was reacquainted with the sublime sights and sounds of this priceless wilderness. Since that labor-day weekend, my wife and I have returned to Yellowstone every year. Our visits have become something of an annual pilgrimage – a tradition that has helped us remain centered. They are a time for family, and a time for making memories with our son. Each visit reignites our passion and respect for the natural world and fuels our desire share and help preserve all that is wild. We are immensely grateful that those who had the wisdom to preserve this gem as a national park "for the benefit and enjoyment of the people". It is in that spirit that we share this 4K visual tribute to Yellowstone National Park. We captured this footage during our visit in September 2017. This virtual tour highlights many of the park's iconic locations and is the next best thing to heading out on a classic Yellowstone wildlife safari. We invite you to sit back, relax, and enjoy the sights and sounds of Yellowstone National Park in breathtaking Ultra HD. Remember to tread lightly and Leave No Trace when visiting our National Parks and other Wild Spaces. What's your favorite part of visiting Yellowstone? Share in the comments below and make sure to check out the many travel resources available here on www.athomeinwildspaces.com. 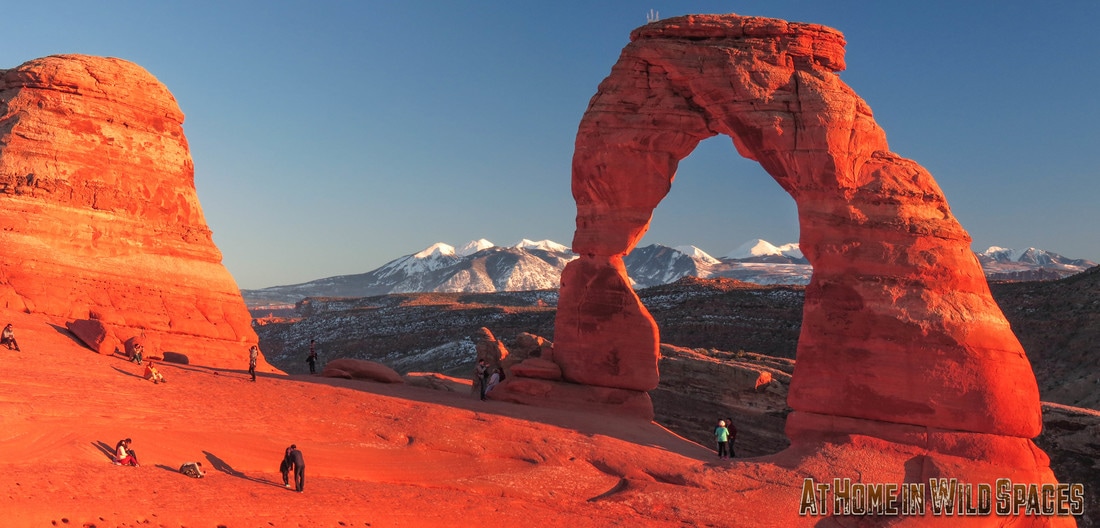 Arches National Park is easily dwarfed by most U.S. national parks, but it's quickly becoming one of the most popular in the park system. The chief attractions here are the park's puzzling, even gravity defying sandstone arches, numbering more than 2000, making Arches National Park is the greatest concentration of stone arches to be found anywhere in the world. And of all these arches: one is more recognizable than the others – named for its precarious stature, Delicate Arch has become the unofficial symbol of the state of Utah. Originally called Cowboy Chaps Arch, the parks most famous formation was not included in the original 1929 monument. It would take nine more years before then Arches National Monument, would be expanded to include what has become its most famous feature. But why has Delicate Arch garnered so much attention? It’s far from the park’s largest Arch, and it’s definitely not the park’s most accessible landmark. There’s perhaps more than one correct answer, but if you’ve ever hiked the 3-mile trail to Delicate Arch then you know there is something incredibly unique about not just the arch, but the setting as well.
It's easy to imagine Mother Nature put a little extra effort into creating this masterpiece. Combined with the sprawling red rock deserts, forested foothills and 12,000 foot+ La Sal Mountains of the greater Moab landscape, the view of Delicate Arch is as wondrous a sight as any we’ve encountered. It really has to be seen to be believed. Pictures, no matter how stunning, will simply never do the experience justice. If you want to truly understand why Delicate Arch has become one of the world most recognizable wonders, you'll have to see it for yourself. So here’s what you need to know before hiking to Delicate Arch: Plan Ahead
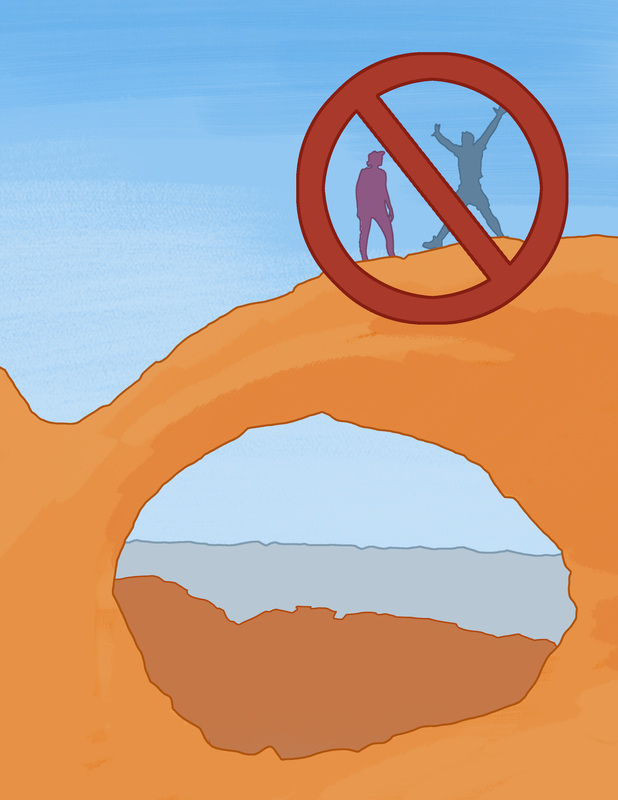
Arches National Park is über popular these days, some might even say too popular. Crowds have become a mainstay of a visit to Delicate Arch, but there is still much you can do to avoid the huddled masses at Delicate Arch. First, avoid holidays, free days and weekends if possible. A free day may sound like a bargain, but believe me, your much better off planning a visit during the off-season or on a weekday and paying the full $25 entrance fee. Arches National Park is even contemplating offering an off-season discount in order to alleviate the pressure of the summer crowds. If you are able, plan to visit when others can’t. The extra effort will be well worth your time. Safety The hike to Delicate Arch is far from dangerous, except for when people get careless. Summer temperatures in Arches frequently exceed 100 degrees Fahrenheit. Make sure you have adequate water and sun protection. Ensure you and those in your party are fit enough for this short, albeit moderately challenging hike. From the Delicate Arch trailhead you’ll gain more than 600 feet without a break until shortly before reaching the arch. In high temperatures, 600 feet can feel like a lot more. Make sure to pace yourself. Along with the elevation gain comes more than a few steep drop offs. The trail offers plenty of space to avoid any perilous cliffs, but you’ll almost certainly want to wander around and get a better view. Just mind your step, stay alert and make sure to watch any children you may be traveling with very closely. Leave No Trace Arches faces a number of challenges in the wake of its growing popularity. Vandalism, and environmental degradation are at the top of the list. Do your part to protect this unique place. Report any vandalism you witness to a park ranger, pack everything out, and never stray from official park trails, bare sandstone and dry washes. Enjoy The Hike to Delicate Arch is a treat, capped by a truly stunning view. Be courteous to others and enjoy your visit to Arches National Park. Are you ready for a classic Halloween tradition with a Wild Spaces twist? Try carving Delicate Arch, Half Dome or Great Fountain Geyser into your jacko-lantern this season. 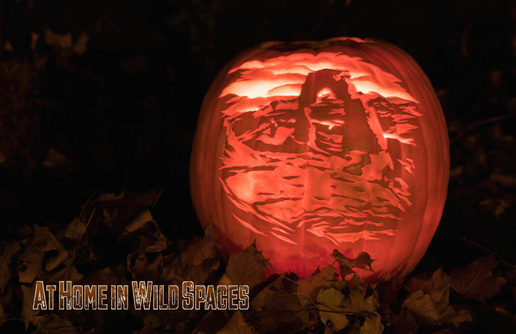 What you'll need: -Fresh Pumkin -Pattern (download below) -Sharp Knife -Exacto Knife -Pins -Metal Spoon (for scraping) -Adult Supervision -Patience
It's essential to find a moist, fresh pumpkin. The dryer and more brittle your pumpkin the harder it will be to carve these patterns. Begin by cutting a lid in the top of your pumpkin about 4-5 inches in diameter. Then scrape the innards out of your pumpkin until the inside walls are clean.
Cut along the dotted lines on the pattern, overlap and pin sections to the pumpkin until flush against the surface of the pumpkin. Then use a poker/nail/thick needle and poke holes along every line on your pattern. The more holes you poke, the easier it will be to see the pattern on the pumpkin's surface when you remove the pattern. Once you've finished poking along the lines, use the Exacto knife to shave the skin from the areas marked as light gray on the pattern. Once you've finished shaving all light grey areas revealing the flesh of the pumpkin, use your spoon to scrape the pumpkin's inner wall until the section with your carving is about half an inch thick. Then using your Exacto knife cut out all areas marked as white on the pattern beginning with the smallest and ending with the largest. Once finished, light one or more candles and place them inside the pumpkin and you're finished. If you'd like to see more National Park Jack-o-lantern patterns, then share this post. If we see strong demand for more we'll publish a book in time for Halloween 2017. For more fun content make sure to follow us on Youtube, Facebook, Flickr and Instagram!
some of the more popular trails. That's not to suggest that you should strike trails like Angels Landing and Half Dome from your bucket list. But often times there are amazing hikes that don't get nearly as much publicity as the paths [more] traveled. Making time for the path less traveled can as the poem claims, "make all the difference". Take the Devil's Garden primitive trail in Arches National Park for example. This some what more challenging trail is not as popular as the hike to Delicate Arch or "Main" Devil's Garden trail, but it's perhaps one of the best hiking experiences within the park. The primitive trail offers a number of lesser known arches, a better opportunity for solitude, and an incredible sandstone playground that most visitors will never see. What's particularly nice about the "primitive" trail is that it can easily be combined with the more popular "main" trail and include a visit to Landscape Arch, considered the largest natural arch in the world, as well as other popular arches, while still enjoying a unique and less trammeled section of Devil's Garden. Together there are more than seven miles of trails through the world class sandstone wilderness called Devil's Garden. A few things to know before you go 1. The primitive trail is considered "strenuous" by the national park service, and includes a number of obstacles which require sure footing a bit of climbing, and occasionally wading through water. 2. The [time] less traveled may be even more important than taking the path less traveled. If possible, align your visit with the off season or weekdays. Avoid holidays as well as spring and fall breaks. Arches in particular can become very crowded. If these times are not compatible with your schedule, then try hiking early. The big crowds won't be up until later.
For more from At Home in Wild Spaces click below!
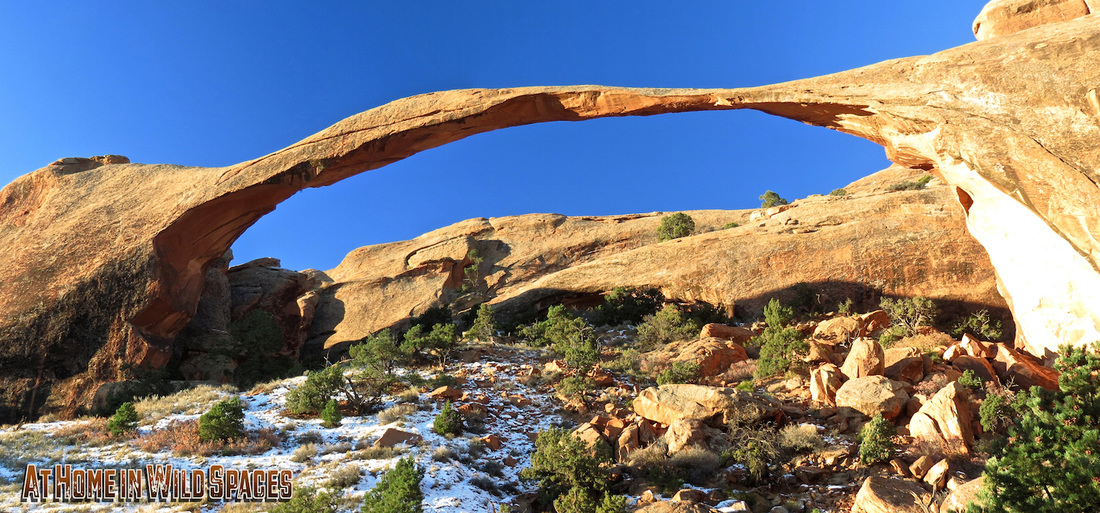
Landscape arch is an incredible 290 ft long which would have been impressive enough by itself, but it is also a mind-bogling 6 ft thin at its narrowest point. It's hard to believe that such a massive and delicate stone structure could be suspended over such a great distance. In fact, in 1991 a 76ft chuck fell from Landscape Arch and reduced it's delicate crest from 8ft thick to its current 6ft. Eventually, time and erosion will win out and Landscape Arch will collapse and be little more than boulders and memories. Whether Landscape Arch's remaining time is measured in months, years, centuries or millennia is impossible to know, but while it stands it will remain a truly spectacular natural wonder. If you want to see Landscape Arch in person (we highly recommend it), then make plans to travel to Arches National Park in Utah. This incredible landscape is home to more than 2000 natural arches. The highest concentration of such arches in the world. You'll find Landscape Arch less than a mile along the Devil's Garden trail. This portion of the Devil's Garden is accessible for all skill levels and features a number of other incredible arches and sandstone formations.
Want more from At Home in Wild Spaces? Click on the links below.Before Yellowstone was Yellowstone, it was called Wonderland. The stories of steaming earth, filled with strange spouting wells and painted pools sounded so fantastical to many 19th century americans that it reminded them of a popular novel of the time, Alice's Adventures in Wonderland.
Just like Alice and her travels in Wonderland many visitors may ask themselves, "Which path should I take?". "Well that all depends on where you want to go". There are paths a plenty in Yellowstone with countless little treasures to discover along the way. Take Mystic Falls for example. This beautiful cascade is only a short introductory hike into Yellowstone's back-country. Watch the video for more information. It's a perfect hike for just about any skill level, and a gateway to even more wonders. Just remember Yellowstone is bear country. Be prepared. Know how to handle bear encounters, make noise when hiking. Travel in groups and carry bear spray in a very accessible location. Make sure to stay tuned to At Home in Wild Spaces for more featured locations and travel tips, including bear safety. And check out the rest of our website. There's tons here for any lover of Wild Spaces. Today as part two of our on-going scaled comparison series where we highlight two structures; one wonder of nature and one man-made structure. Today, we're highlighting two icons of North America: The Statue of Liberty (305ft tall) in New York harbor and Rainbow Bridge (290ft tall) located in the desert canyon lands of Southern Utah along the shores of modern day Lake Powell. One serves as an icon of freedom and liberty to a nation comprised mostly of relative new comers, the other an icon of natural beauty, and a sacred site to a people with ancient and deep spiritual ties to the land. Together they represent a diverse set of ideals and history which sometimes clash. We invite you to consider the contrasts and compliments of these two iconic locations and share your thoughts with us in the comments section. 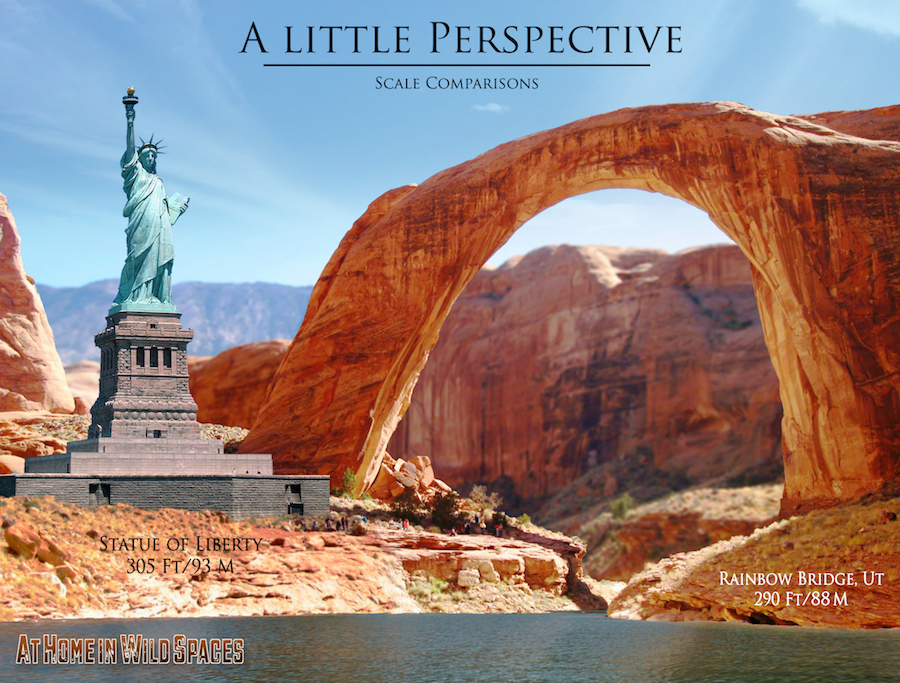 It's been raining a lot in our neck of the woods, and we couldn't be more excited about it. In addition to the aroma of clean air and the re-invigorated vegetation, the new rainfall is mixing with winter's runoff and waterfalls are entering their peak season. And even though you can find waterfalls almost anywhere, there are a few Wild Spaces that really stand out. Yosemite National Park is perhaps North America's King, but Mt. Rainier National Park may very well be the Queen. Her offering of both thunderous cascades and melodious falls is staggering. Where other Wild Spaces may have cascades numbering in the hundreds, Mt. Rainier offers thousands, and they are never more plentiful then from May through July. It's been said that if there is one destination every American should visit in their lifetime, it's the Grand Canyon. Honestly, when there are so many amazing Wild Spaces to visit, it's impossible to narrow our priorities to a single location. But, any list of must see Wild Spaces simply has to include the natural masterpiece that is the Grand Canyon. It's beyond description, and any lover of Wild Spaces will be struck to the core by it's presence. And here's a friendly tip: Schedule in some time to watch the sunset. You'll be glad you did. And if you're lucky, you may even be fortunate enough to experience a Condor Sunset. One of the rarest animals in the world, and there may be no better place to view them, then at the Grand Canyon. |
Wild Spaces
|
|||||||||||||||||||||||||
 RSS Feed
